Main Structure
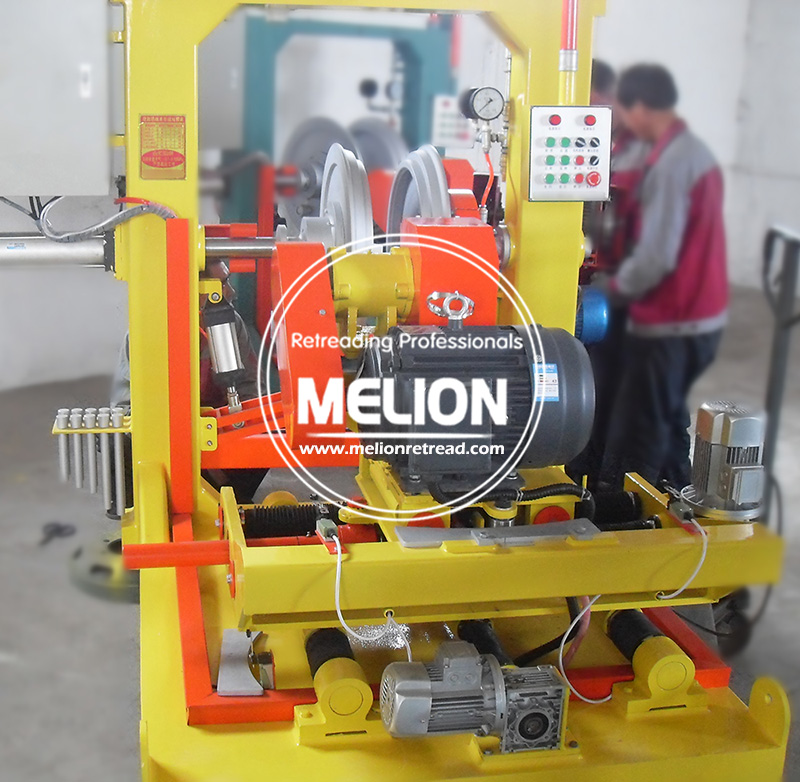
This equipment mainly consists of the Frame, Buffing Motor, Limit Control Motor, Lead Screw, and Curve Buffing Head, Vacuum Chuck, Pneumatic Components and Electric Control Cabinet.
Commissioning
Before commissioning conducted, read the instruction carefully and check all the moving parts, Air Circuit and Electric Device. Apply proper lubrication oil and grease to the parts that needed to be lubricated.
1 First of all, adjust the pressure of the Inflatable Chuck Plate and ensure the pressure in the tire is in the range of 0.1~0.15Mp. When this pressure exceeds 0.2Mpa, the Safety Air Bleeding Valve shall be activated to instantly bleed air out. In case any parts damaged from over pressure.
2 Activate the Left-to-Right Limit Control Switch and adjust the position the Buffing Motor and make it move smoothly within the set range specified on the Radian Plate; meantime, adjust the center positioning of the Radian Plate and align its center line with the center of the Chuck Plate.
3 Activate the Front-to-Rear Limit Control Switch, and adjust the Buffing Head and make it capable of Buffing in minimum space 6.50R16’,and maximum 1,200’, and also ensure the Lead Screw work steadily.
4 This equipment is designed with Pneumatic Regulating Valve. With the guidance of nominal parameters, the pneumatic regulating valve regulates each of the cylinders work smoothly so that expecting effects and technical requirements would be maintained.
Mass Production (Operation Regulations)
1 Place the Carcass (already scrubbed and dried) onto the Buffing Chuck Plate. According to the type of the tire, adopt different Ejecting Rod and relevant scale on the Radian Plate (Take the data on the mark as a standard). Then inflate the tire up to 0.1~0.15Mpa (turn on the low speed inflation switch if local permeability occurs). When the pressure reaches that value, the High Speed Inflation Switch shall be turned off.
2 Turn on the Positive Rotation Switch, meanwhile jog the FORWARD button, and make the Crown 10mm to the largest Outer Ring of the Buffing Head; then release the jogging, turn on the Circulator Switch first, and then the Buffing Head Switch comes next.
3 Jog the FORWARD button, when there is a Contact between the Tire and the Buffing Head, press either button of “Left-to –Right Limit Control Switch” to begin the Buffing. When the Buffing Head reaches the Primary Stroke of the Tire, jog once “FORWARD” button. Jog the button repeatedly (with each jogging, the Buffing Head advances 1mm) until there is Pile showed on part of the tire (or 2mm to the Steel Wire), then stop jogging. Then keep this distance and make 2 strokes of Buffing to both left and right sides. After this, leave the Buffing Head at the Center position of the Radian Plate. Jog “BACKWARD” button,
4 After finishing Buffing the Crown, instantly release the air inside the Chuck Plate and the pressure goes down to “0”Mpa. Pull the Hand Switching Valve and separate the Chuck Plate Ejecting Rod from the Air Cylinder Shaft. Then pullback the Chuck Plate and unload the tire. Then deliver the tire to the smaller Buffing Machine through Lifting Frame for fine finishing.
That’s how to operate MELION’s Tire Retread Buffing Machine.


